
1) Gearbox mount needs amending.
When I fitted the gearbox rubber and bracket it was 12mm away from the body (in order to keep the prop shaft level) so this weekend I took off the rubber mount, used a crow bar to pull out the rubber bit and then trimmed the bracket down my 12mm. Plenty of Sikaflex into the mount and 12 hours later the rubber part is solid again.

I have also never been happy with the threaded bolts holding on the bracket. The metal in the chassis only allows a couple of threads and I though a combination of an M10 and an M8 bolt would suffice but putting the bracket back on I just wasn't happy with the fact things wouldn't tighten up as much as I wanted to and I was scared of stripping threads completely.
The solution was to drill right through the chassis and into the tub in one of the holes so that I could but a long M8 bolt through with penny washers and nylocs. This was much easier to tighten and I am much happier with the thought of so much torque going through the gearbox and its mount.
2) Boot Gas Struts Not Fitted
I had attached the boot brackets as per the AK instructions (19" diagonal to rain gully from boot hinge) and moulded them in with P38. All I needed to do was rivet on the boot hinges (11") lower bracket and let some gas out of the struts to allow the boot to open/close.
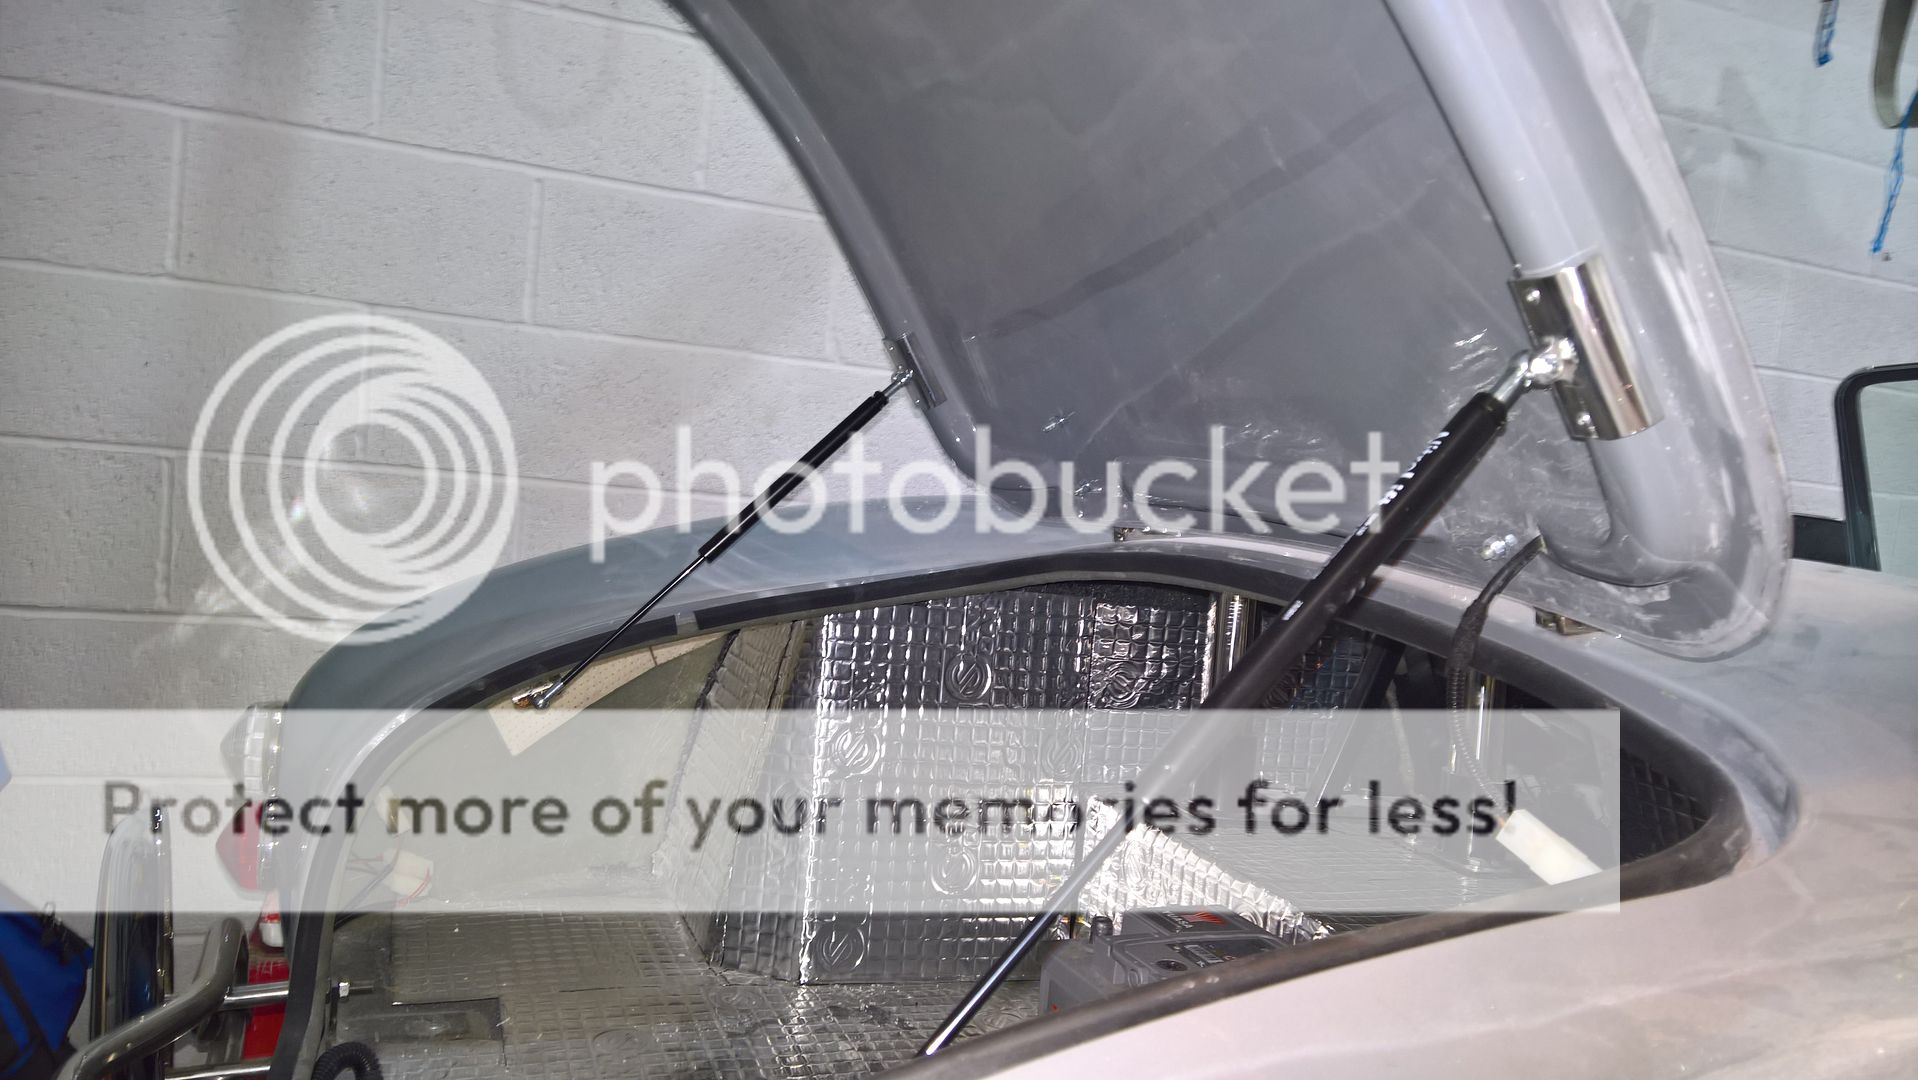
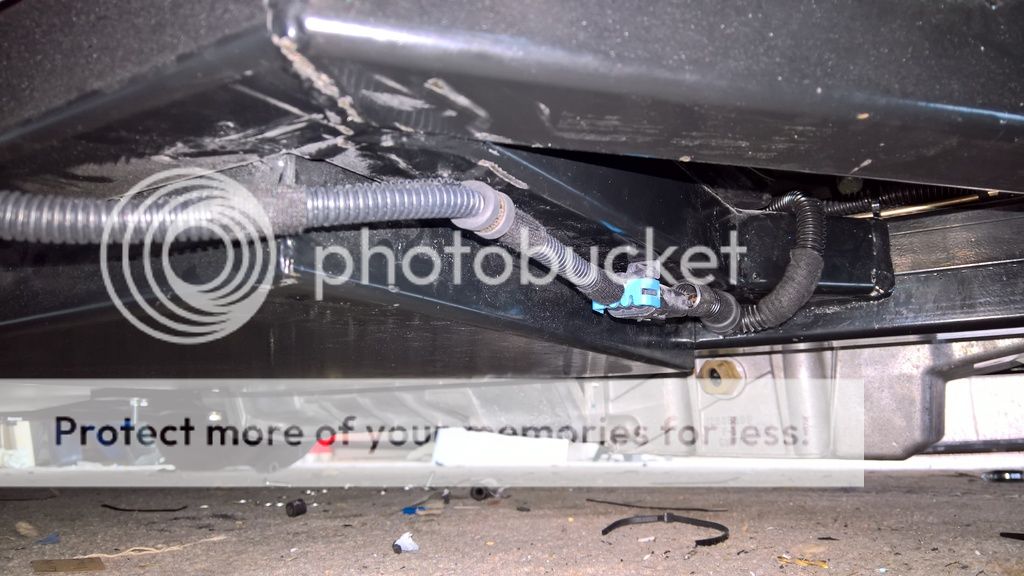
3) Lambda sensor wires hang downI had attached the boot brackets as per the AK instructions (19" diagonal to rain gully from boot hinge) and moulded them in with P38. All I needed to do was rivet on the boot hinges (11") lower bracket and let some gas out of the struts to allow the boot to open/close.

The lambda wires needed to be clipped up into place under the car to prevent them from snagging (an IVA fail). Again, easily fixed with a couple of p-clips and rivnuts each side.
4) Brake pipe and Fuel pipe adjustments
Whilst under the car doing the gearbox I noted that I had a small leak on one of the brake pipe connections. Easily tightened and sorted. I also noted that my fuel pipe had a bit of excess play so I quickly added another p-clip to ensure it stayed clear of the prop shaft.
5) Indicator and Headlight Bulbs
I had major issues sourcing the correct bulbs for the lucas lights as they came with clear bulbs and I needed amber for the indicators. They also came with blue tinted headlights and they must be white light for IVA. LED versions for the indicators didn't work well at all, then I tried Halfords (didn't fit) and CBS in an attempt to get the right bulbs. All sorted now after finding the article below.
https://en.wikipedia.org/wiki/List_of_automotive_light_bulb_types
Essentially the R5W bulb that came with the indicators is a sidelight bulb, hence the problems finding it. First you need to check the cap base, for me this was a BA15s. This makes sure its the right size base. Secondly you need to check if it is opposite of offset pin. For me it was opposite, which was a P21W as opposed to a PY21W which is offset.
Getting silver/chrome bulbs also helped avoid the fried egg look.
6) Washer Jets
I finally got around to completing the washer jets too. This was simply a case of cutting Halfords washer jet tubing (5mm) to lengths of the right size to run along the wing around the coil packs I had fitted and up to the first jet.

Here I cut the tube and inserted a 5mm T-piece. Two other lengths were then cut to run to the jets and it was held in place by cable ties attached to cable tie base plates.
Here I cut the tube and inserted a 5mm T-piece. Two other lengths were then cut to run to the jets and it was held in place by cable ties attached to cable tie base plates.
In order to hold the tubes in place I used 5mm spring clips from ebay for the S&J washers and 7mm for attaching to the washer bottle pump and the T-piece.


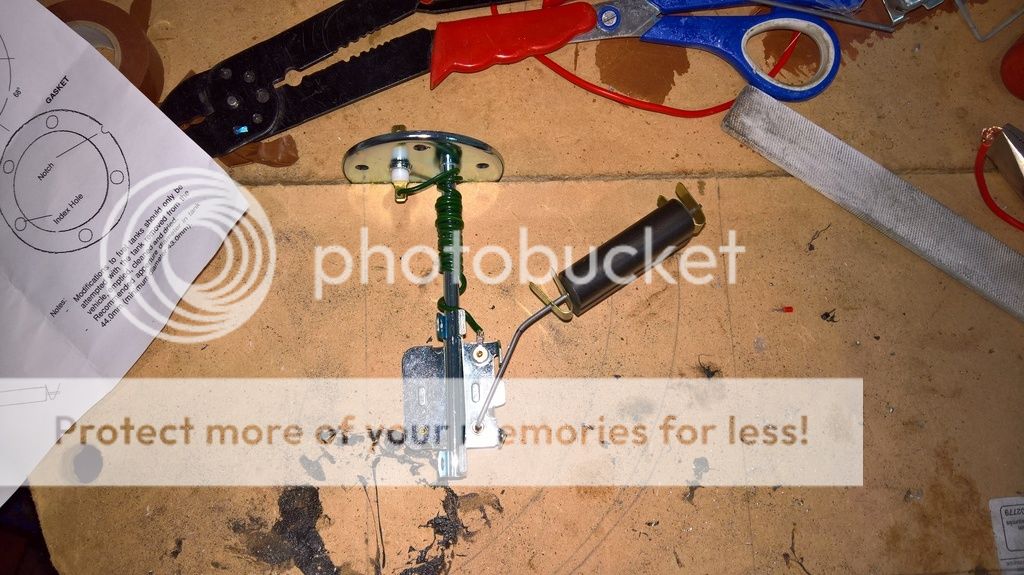
The fuel sender that I had been given, which seemed to fit the AK tank well does not work with the Smiths Flight gauge it was actually for a smiths classic gauge. After speaking to Europa Spares they confirmed that I needed different sender. It is cut and fit in a very similar fashion to the previous sender I fitted, however, its smaller and doesn't fit the holes in the AK tank. This meant I needed to fit either an adaptor plate or bond it into place. I decided to bond it into place as there would be fewer surfaces connecting which meant a lower chance of leakage.


7) Fuel Sender not working

Even fitting this sender as per the instructions wouldn't quite get the gauge right as it was working backwards. I am not entirely convinced the gauge isn't faulty but luckily the instructions said "if the gauge works backwards check the diagram as you may have bolted the transducer upside down"; this led me to just fit it upside down and now its working. It seems very sensitive though so I may suffer from a jumpy needle whilst driving.
Perhaps a generic electronic configurable sender would have been a better option; just look at how sensitive the needle is. Theres about 13 litres of fuel in the car from dry to get the needle to this point.
8) Alternator wing adjustment
On the AK the alternator touches the wing so you need to cut out a small square in order for the body to sit on right and to ensure the alternator doesn't get damaged. I have the built the wing up with fibreglass and p-38 so that its still protected from all the crud being sent up from the wings. I completed most of the work some time ago but I just needed to sand it down and paint it up with isoflex rubber paint.

No comments:
Post a Comment