
As I thought about the next job on the build my biggest concern became knowing everything mechanically worked before fitting the body so I decided to build up a test rig that would get me to the point.
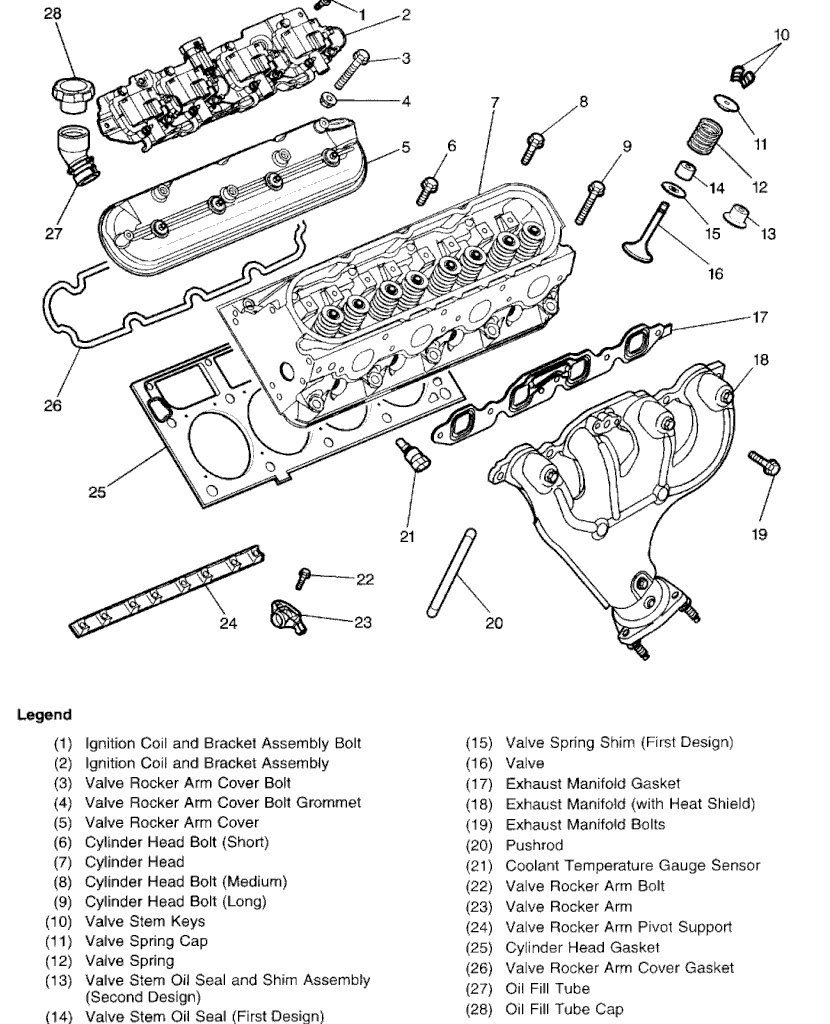
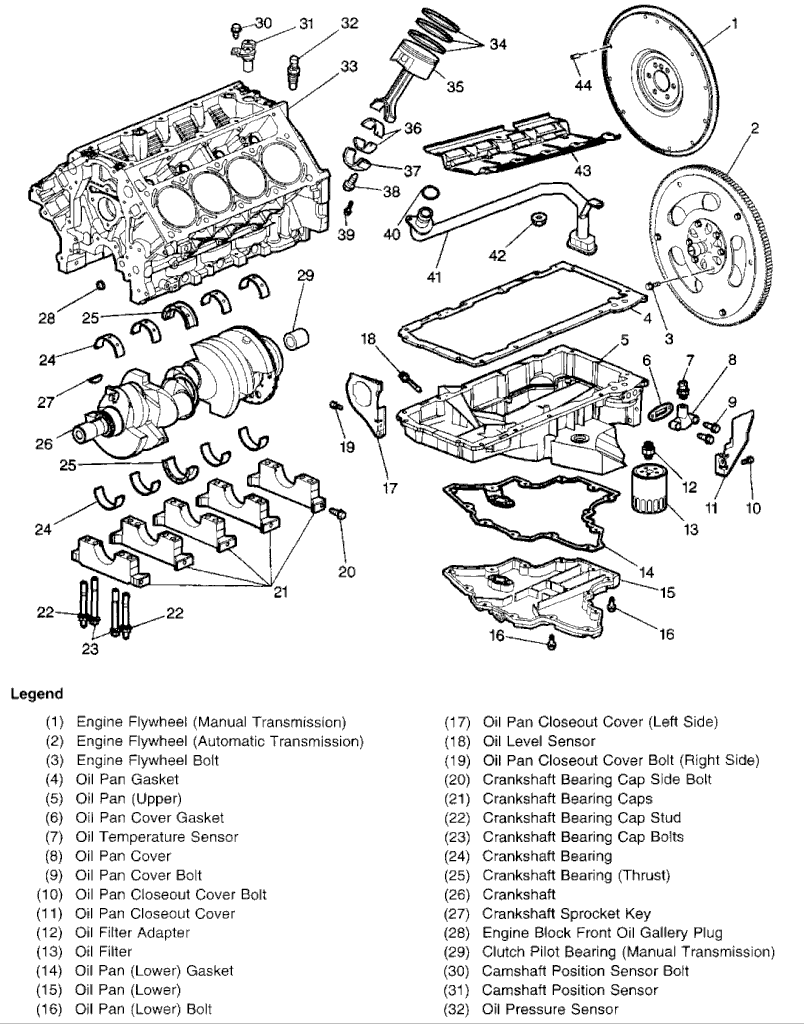
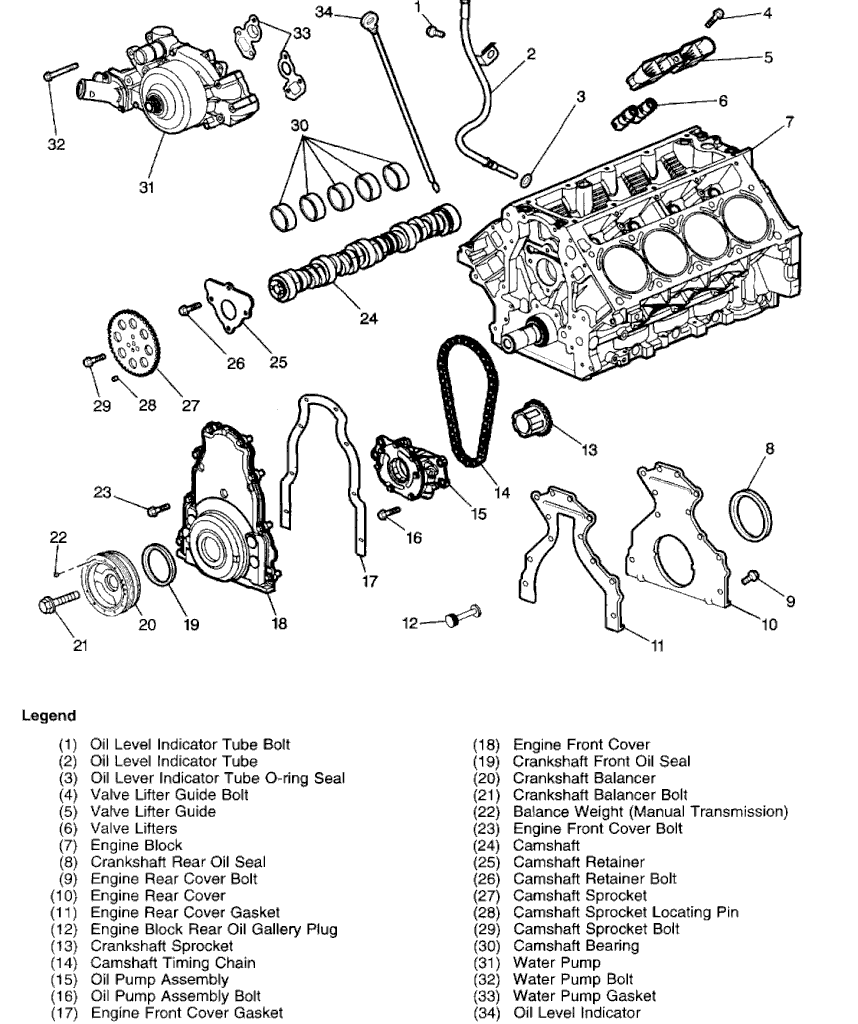 First job was to fit the Canems ECU, mainly because one of the sensor connections goes behind the starter motor. Finding the sensor locations was more difficult than I thought; being a first time builder its not immediately obvious where everything goes. I obtained the wiring diagram from Dave at Canems and then tracked down the images to the left and right on the net which helped to identify where to connect the ECU. I make it sound easy but actually this took a few attempts to get everything where it was supposed to be.
 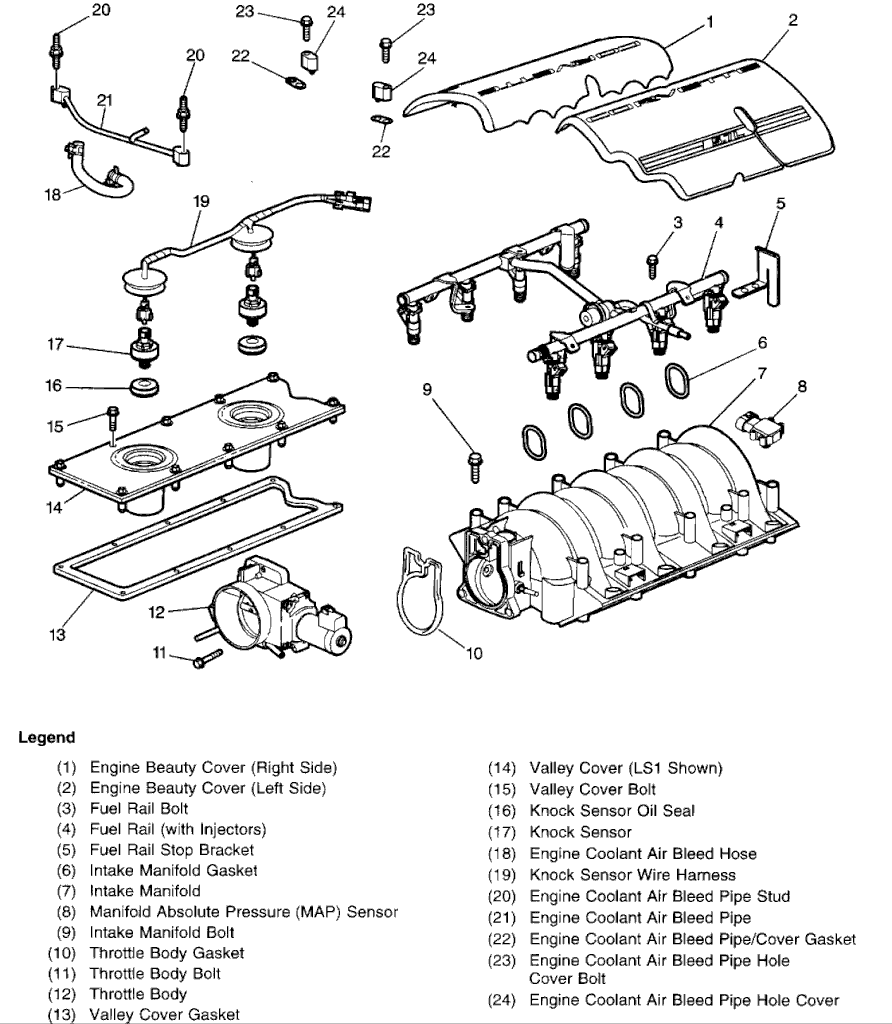 The Canems ECU is very well made, with all the connectors plugging straight onto existing sensors. Canems can also provide the modified fly by wire pedal (which AK can incorporate onto their pedal box) and the air temp sensor (which is a standard GM resistance curve sensor on the LS).
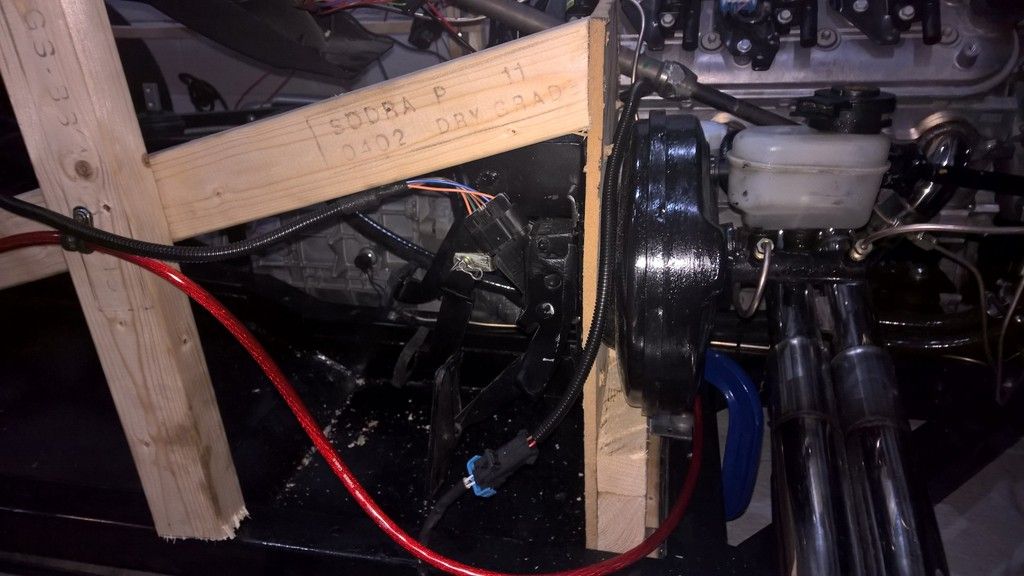
Once the ECU was connected to the block I could fit the starter motor. A fairly straightforward job of putting in two bolts.
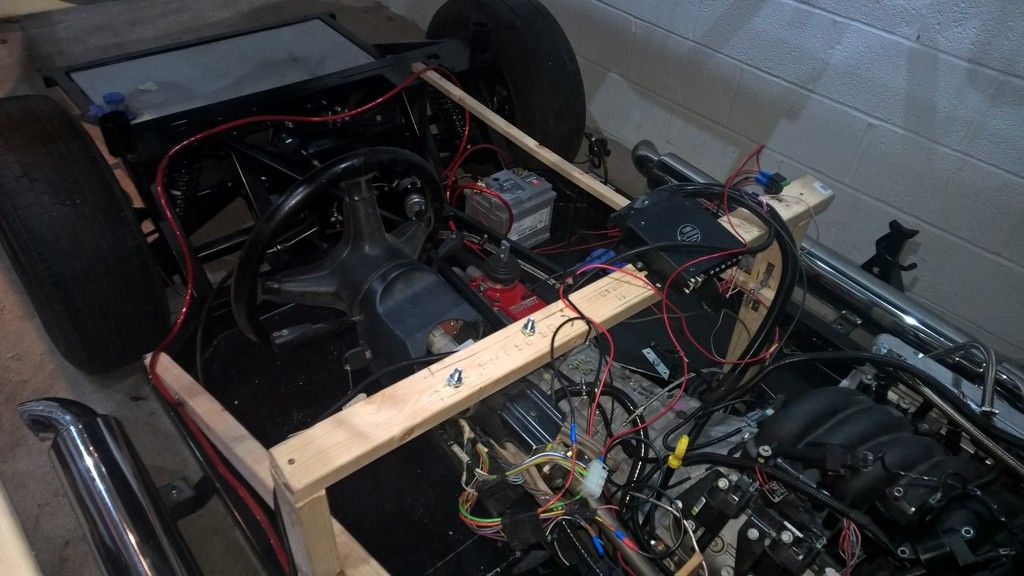 Next - onto some fabrication out of bits of wood I had around the garage. I wanted to create a panel to attach the clutch, brake servo and pedal box onto as well as a full scuttle hoop to be able to attach the steering column to. This job is very easy to do with a few angle brackets, 7-10mm drill bits and a few drill mounted hole saws (the same as you would use for the indicators). Some parts of the job require a couple of people and/or G-clamps to hold bits in place whilst its screwed together but in just a few hours you can have it put together.
To keep things simple I decided to ditch the AK loom for the test and create just the wires I needed to as troubleshooting would be much simpler if I knew what every wire did.
Then I had to figure out what wires on the BMW stalk were the ignition. Simply put its:
- Thick Red - positive input from starter motor
- Thick Green - First ignition click power out
- Thick Purple - Second ignition click power out (connected to fuel pump relay for the test)
- Black/Yellow - Momentary start power out (connected to small input on starter solenoid for the test
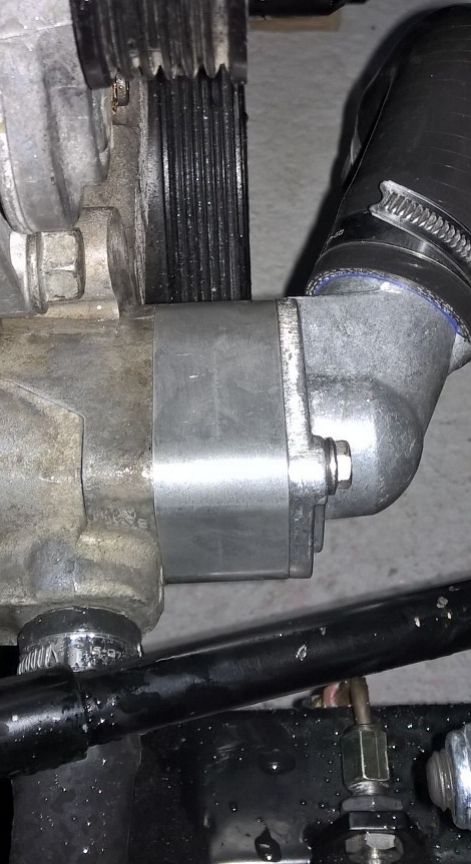
Next up was to fit a spacer that davidg from the cobra forum had made for me as the drive belt was going to foul on the thermostat housing. It required some M6 x 55mm flange bolts which I had ordered earlier in the week.
Luckily I had another O ring from the previous thermostat to ensure it all sealed properly but if you didn't have that I am sure any water gasket sealant would work.
The workmanship from david was perfect and after filling with coolant not a single leak.
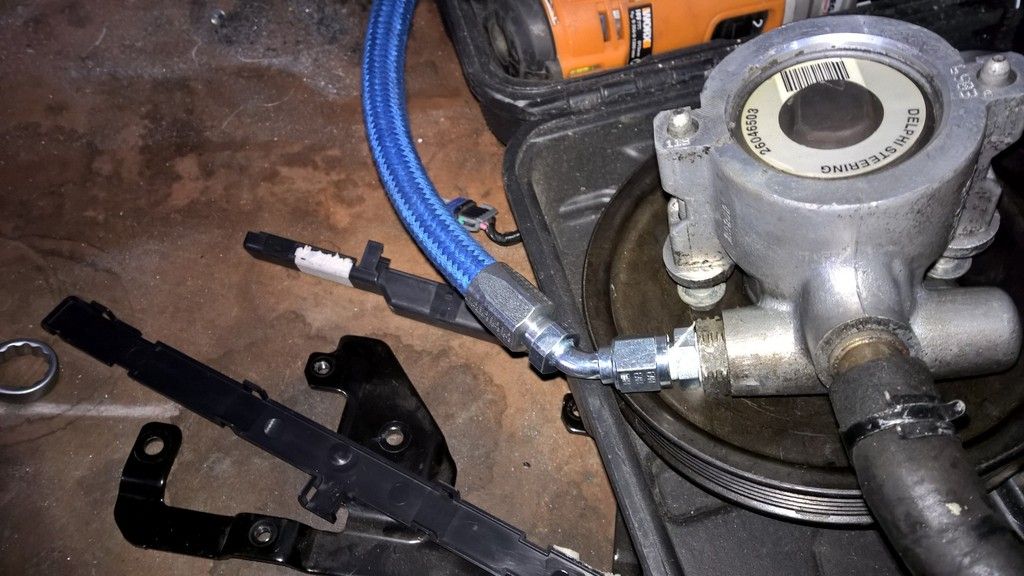
Last two jobs - power steering and fuel delivery.
The power steering hoses were purchased through Earls the same as my custom clutch hose. They were great costing £120, both 1m long including all the joints I needed:
- M14 pressurised input on BMW rack
- M16 for return on BMW rack
- Open hose with jubilee for power steering return
- 5/8ths power steering adapter for pump
Finally I put 5 litres of fuel into the tank and ran off a litre into a bowl to clear any crud out. Then I filled the pump with fuel to prime it (obviously removing hoses and reconnecting as necessary). Wiring the fuel pump was a simple case of:
- a 30amp relay running positive from the battery to the pump.
- a negative running from pump to earth
- a negative running from relay to earth
- a 12v positive running from ignition position 2 to relay.
Turning the ignition key then set the pump flowing which I allowed to run for a few minutes to ensure all items would take the pressure, that there wasnt any leakage and that the return valve was sending excess fuel back to the tank.
A quick connect and bleed of clutch and brakes and.....
Everything was good so all in all I was pretty chuffed with myself. :-)
After filling the power steering fluid (I used Dexron III ATF/PS Fluid) I turned the key for the first time to start to ensure the starter motor would engage and again all good. A clean sheet of tests passed with no leakage or re-work required.
I have just the fan to connect to the Canems ECU and the oil pressure gauge to connect which I ordered today from Digital Speedos. Dave from Canems is booked for Friday 8th Jan to come to my home and help me start her up for the first time and properly map the ECU now that I have lamda sensors (previously only mapped on the dyno).
So watch this space readers - I expect to post a video of the engine running this weekend - a major milestone if I achieve it.
No comments:
Post a Comment